
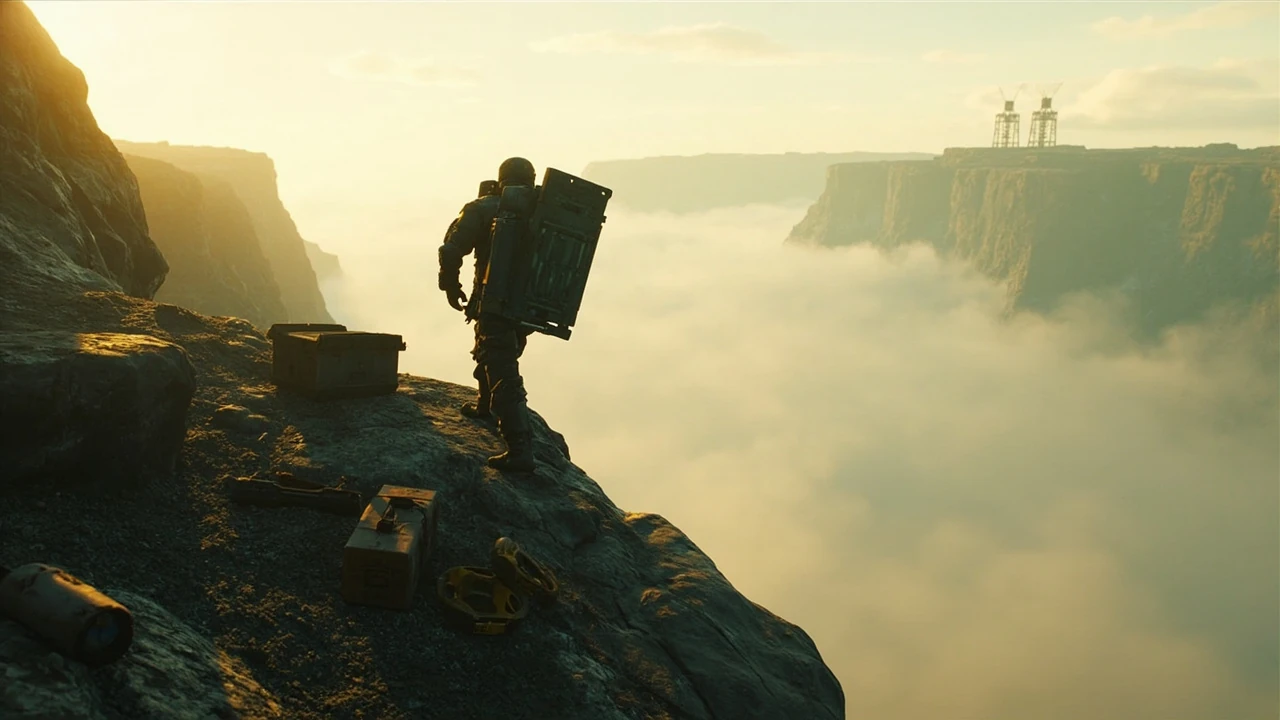
Death stranding walkthrough: planning a route before your boots touch the ground
Most players fail their first long-haul delivery in Death Stranding long before a sniper or BT swarm ends the run. They fail in the menu, because they never separated the trip into legs, never balanced the cargo on the frame, and never checked where the climb gets steep and the path gets narrow. This death stranding walkthrough treats traversal as the core mechanic it actually is: every other system, from weapons to online structures, exists to make your route from point A to point B survive contact with the world.
Think of a porter’s run as three overlapping layers. There is the macro route across the map, the per-leg micro route across the terrain, and the per-second balance of Sam’s posture, breath, and the cargo on his suit. Each layer is its own skill, and each one feeds the next. A route that looks great on the map can still fail on a single wet rock where the cargo swings past your center of mass. The walkthrough below moves from the macro layer down to the micro layer, then opens up into the systems, side activities, and boss prep that finish the journey.
What this walkthrough covers, and what it deliberately leaves out
- Route planning, cargo stacking, and order-of-delivery choices for the first four episodes.
- Traversal tools, vehicles, and the moment each one becomes worth the build cost.
- Combat, stealth, and the rules for engaging BTs, MULEs, and human enemies.
- Online structures, chiral bandwidth, and the social systems that quietly carry your run.
- Boss fights, recovery strategies, and how to keep a delivery alive after a wipe.
Spoilers for main story beats are kept at a level that lets you plan a delivery without knowing the final outcome. If a section needs more detail than that, it is marked so you can skip ahead on a first playthrough and return later.
How Death Stranding’s delivery loop actually works
Every order is a small simulation. You decide what to carry, how to stack it, which route to take, and how to react when the environment pushes back. The map rewards planning more than reflexes, but it punishes planning that never got tested on a real slope. Walking the first mile with a full load is the only way to learn where the simulation will reject your assumptions.
The four variables that decide whether a delivery lands
- Total weight, which sets the load class and how fast Sam tires.
- Weight distribution, which controls whether the cargo frame tips you on uneven ground.
- Terrain profile, including slope, surface, water depth, and the presence of BT zones.
- Time of day and weather, which change visibility, footing, and BT activity.
If you can keep those four in balance, the rest of the delivery is just bookkeeping.
Load classes, at a glance
| Load class | Typical weight | What it feels like | Best transport |
|---|---|---|---|
| Light | Under 20 kg | Steady, easy steering, fast recovery from trips | On foot, ladders, short ziplines |
| Standard | 20 to 60 kg | Noticeable drag, careful on slopes | On foot, reverse-trike when roads exist |
| Heavy | 60 to 120 kg | Slow turning, hard to recover, breath meter tightens | Trucks, multiple carriers, route with roads |
| Extreme | Over 120 kg | One stumble can break cargo, footing must be perfect | Vehicle only, avoid BT zones, use online structures |
These are not official numeric thresholds, but they describe how each delivery feels once you have tried a few of them. The simulator’s exact weight numbers change as the build patches, while the perceptual bands stay useful.
Building a route that survives the first hour
Open the map. Pick a destination. Then resist the urge to plot a single straight line, because the fastest path on a flat map is often the worst path on a real hill. Routes that survive contact with the world share three properties: they cross difficult terrain only when the alternative is worse, they use a road or a safe stream as a spine, and they keep one retreat option within a short sprint.
A repeatable planning routine
- Drop a flag on the destination and read the elevation profile in a straight line. Note the two steepest sections.
- Walk mentally along the ridge lines and ask which one keeps you out of BT territory and away from MULE camps.
- Find a paved road or a shallow river that runs at least part of the way. Roads and shallow water both reduce the cost of heavy cargo.
- Insert one rest point near the midpoint, ideally near a prepper shelter or a known online structure.
- Decide what tools and weapons you are carrying for the route, not for the destination.
The midpoint rule is the one most players skip on the first run, and the one that pays off the hardest. Even a short break on a rock that is stable enough to put the cargo down is enough to recover stamina, rebalance the load, and plan the second half of the leg.
Stacking the cargo frame so it stops fighting you
Weight alone does not tip a porter over. The shape of the load and the order of the pieces on the frame decide whether the load stays centered. Treat the frame like a vertical column: heavy boxes low and tight to the back, fragile items on top, and the largest flat faces against the suit so the center of mass sits over Sam’s hips rather than his shoulders.
Stacking rules that hold up in the field
- Heavy on the bottom, light on top. Tall stacks raise the center of mass and amplify every stumble.
- Pair left and right. If a side is empty, the load leans on every turn, and the suit compensates with slower, wobblier steps.
- Fragile cargo, including medical supplies and special deliveries, goes on the shoulder straps rather than the frame so the frame can absorb the bounces.
- Use the all-terrain anchor on steep descents and keep at least one anchor slot free for emergencies.
- Keep the hands free unless a weapon is essential. A loaded frame and a two-handed weapon together is a recipe for a faceplant.
Once a load is balanced, practice the small movements before committing to the route. Take ten steps on flat ground, then a slope, then a corner, then a hop over a rock. If any of those micro-tests feels unsafe, redistribute the load before you start the real delivery.
Traversal tools and when each one earns its slot
Tools are not upgrades in the traditional sense. They are answers to specific problems. Carrying every tool on every delivery just slows you down and starves the frame of space. Pick a tool for the terrain you are crossing, not for the tool you like to use.
Tool selection by terrain
| Terrain | Best primary tool | Optional support | Why |
|---|---|---|---|
| Flat ground, short distance | Standard boots, ladder | None | Speed and low cost outweigh any tool advantage |
| Steep climb, no path | Climbing anchors and ascender | PCC for shortcuts | Reduces time on the wall and preserves breath |
| River crossing | Reverse-trike or truck | Power skeleton for depth | Keeps cargo dry, prevents water damage |
| BT zone | Anti-BT handgun or blood grenades | Covering the smell with grenades | Controls the encounter without drawing every BT |
| Long distance with good roads | Truck or multiple carriers | Generator to recharge mid-run | Speed dominates load class at this scale |
Reverse-tris and trucks are tempting to use everywhere, but they fail on slopes they cannot climb, and they turn BT zones into trap zones. Reserve vehicles for legs that actually have road, and keep a pair of boots ready for the legs that do not.
Combat and stealth without losing the cargo
Death For additional context, Stranding rarely rewards a fight that interrupts a delivery. A long, messy gunfight leaves the cargo exposed, the suit worn, and the route burned. Stealth and avoidance should be the default in this death stranding walkthrough, with combat reserved for the encounters that block a path that no detour can bypass.
When to fight, when to hide, when to run
- Fight MULEs only when you intend to recover cargo or a vehicle. Otherwise circle wide and cut back to the road.
- Hide from BTs by walking, not by running. Your footsteps are the only signal that matters, and running triggers the catcher.
- Run from human camps when the alternative is a fight that will take more than a minute. Time lost on a detour is usually cheaper than cargo lost in a shootout.
- Use bola and tranquilizer weapons to keep cargo safe. Lethal ammo shatters containers when the round passes through.
Stealth is not passive. It requires reading the patrol pattern, picking a path that keeps tall grass or buildings between you and the enemy, and timing your crossing so the patrol has just turned away. When the timing is wrong, hiding in cover beats fighting in the open.
Managing BT encounters
BTs respond to sound, motion, and the smell of cargo. Holding breath keeps you quiet for a short window, but it also locks your movement to slow, deliberate steps. A held breath that times out is a fight you did not plan. Aiming for short, controlled holds through BT clouds, with a clear exit toward solid ground, is the safer pattern. Anti-BT weapons break the cloud into a fast encounter, but each shot also pulls in more BTs. Use them only when the cloud is small, or when you have already planned the route to the next safe zone.
Online structures and the social layer that carries your run
The asynchronous multiplayer systems are the most distinctive piece of the game, and the easiest to ignore. Bridges, generators, signs, and timefall shelters left by other players do not look like much, but they are the difference between a clean first-time delivery and a frustrating one. The walkthrough does not tell you to rely on them, but it tells you not to ignore them, and to spend a small share of your time and materials on building your own once you are stable.
What other players’ structures actually do
| Structure | Effect | Where to prioritize building your own | Maintenance cost |
|---|---|---|---|
| PCC bridge | Removes river and cliff obstacles for any player | Any chokepoint you use twice | Materials from your own stock |
| Generator | Recharges vehicles and equipment on the spot | Long legs with no prepper shelter | Chiral crystals and ceramics |
| Timefall shelter | Slows cargo degradation in rain | Routes that take more than one trip | Metals and chiral crystals |
| Sign | Warns other players of danger or reward | Near BT fields and cliffs | Negligible |
You do not need to build everything. Build one bridge, one generator, and one safe house on the routes you use most, and the social layer quietly amplifies your capacity. The Wikipedia entry on Death Stranding places the social strand of the design alongside its traversal strand, which is one reason the systems stay useful even on a first isolated run.
Episode-by-episode pointers for the first playthrough
The story breaks the map into episodes, and each episode has a different personality. The walkthrough does not script a run. It points to the decision that decides whether the run is fun or frustrating.
Episode 1 to 2: learning the loop
Stay on foot. Use the reverse-trike only on a road, and only when the destination is far enough that the time saved beats the risk of a crash. Accept the loss of one or two deliveries to learn the boundaries. Repair tools from the prepper menus, and do not hoard chiral crystals.
Episode 3 to 4: the map opens
Pick one farming, one medical, and one engineering prepper early, because the materials they unlock are the ones that decide mid-game runs. Build one bridge and one generator on the route you take most. Avoid the temptation to use lethal weapons. Lethal ammo breaks cargo and costs materials you will need for the harder deliveries ahead.
Mid-game: when the network starts to pay off
Once your preppers are connected, focus on a single cargo class per run. Mixed runs feel efficient in the planning stage and frustrating in the execution stage. If the path is steep and short, run a light load. If the path is long and flat, run a heavy load on the truck and use two carriers if you have them.
Late game: long-haul logistics
Trucks dominate. Routes that look impossible on foot become routine when a road connects the start and the end, and a generator sits at the midpoint. Save chiral crystals for the moments a generator runs dry, not for the moment a truck flips on a slope.
Boss fights and the wipe-recovery plan
Boss fights are not puzzles. They are tests of resource management and route reading. Each boss has a telegraph pattern, a counter you can build toward during the run, and a recovery moment after a wipe. The walkthrough approach to bosses is the same as the walkthrough approach to deliveries: know the load, know the route, and know the exit.
Pre-fight checklist
- Confirm your weapons, ammo, and grenades are in the right slot, not in the cargo frame.
- Place a marker for the path back to the prepper shelter or the safehouse nearest the arena.
- Drop non-essential cargo into the private locker so a wipe does not lose the run.
- Check chiral crystal count, which is the real currency of a recovery, not the one on the in-game menu.
After a wipe, walk back in. The map has not changed. Your cargo has not changed, unless you left it in the locker. The only thing that has changed is you, and you now have information the first attempt did not.
Delivery ratings, likes, and what to do with the social reward
Each delivery has a hidden evaluation. Lighter loads, faster times, and untouched cargo all contribute. The walkthrough does not chase perfect ratings on a first run, because perfect ratings on a first run are the most common cause of a broken second run. Aim for safe deliveries, then tighten the route on the second pass.
What likes do for a porter
- They raise the prepper connection level, which unlocks new gear, new structures, and new orders.
- They contribute to the social strand of the map, which feeds into the story at a few key beats.
- They reward consistent routes, not one-off perfect runs, which is why the second pass is the better pass.
The For additional context, first public trailer for Kojima’s Death Stranding introduced the strand-based world long before the systems were fully understood, and the social strand is the one that turned out to be the most durable part of the design.
Common failure modes, and how to read the warning signs
Most failed deliveries in Death Stranding look sudden. They are not. The failure usually started with a warning that the porter chose to ignore. The list below pairs the warning with the cheap check that prevents the failure.
Warning, check, fix
| Warning | Cheap check | Preventive fix |
|---|---|---|
| Stamina bar drains faster than usual | Read load class and current weight | Drop cargo, or move it to a vehicle |
| Timefall forecast on the map | Check shelter locations along the route | Add a timefall shelter to the path |
| BT cloud near a planned crossing | Walk a wider loop, not through the center | Use anti-BT weapons on small clouds only |
| MULE camp blocks a road | Look for a ridge path above the camp | Switch to foot and circle wide |
| Vehicle slides on wet grass | Drop to low speed before the turn | Use the truck only on paved roads |
Once you start pairing warnings with checks, the map becomes a list of small decisions, and small decisions are the part of the game the simulation handles best.
Recovery, save discipline, and how to keep a run alive
Death Stranding autosaves often, and that is both a help and a trap. It helps because you can push for a hard delivery without fearing a lost hour. It traps because the autosave can lock in a bad state. Save discipline in this game is about creating clean recovery points, not about managing file space.
Three save moments that almost always pay off
- Before a boss arena, after the prepper shelter or the safehouse.
- After stacking the cargo frame for a long run, before leaving the terminal.
- At the midpoint of a long route, near a generator or a shelter, before pushing into the second half.
If a wipe happens after one of these moments, recovery is a short walk. If the wipe happens before the next save moment, the next decision is to retreat, not to push forward.
Advanced play that does not require a second playthrough
Some techniques only become available later in the network, and they do not require a New Game+ run. The list below is the order in which the techniques become useful, with the decision that turns each one from a curiosity into a tool.
Techniques in the order they earn their cost
- Exoskeleton legs, which let heavy loads move on foot at the speed of a light run.
- All-terrain anchor, which stabilizes the load on slopes and on river beds.
- Multiple carriers, which split heavy loads between two vehicles on flat roads.
- Zipline networks, which turn vertical maps into linear maps once the first anchor is built.
- Covering grenades, which let a porter walk through a BT cloud without triggering a fight.
Each technique is a multiplier on a different part of the route. Pick the one that matches the bottleneck in your current run, and build toward that one before adding the next.
Reading the map the way the simulation reads it
The map is not a photo. It is a simplified terrain model. Elevation lines on the map correspond to slopes in the world, but the simulation also reads surface type, water depth, and the presence of cover. A line that crosses a flat area on the map can still cross a swamp, a river, or a BT field in the world. The walkthrough habit is to read the map in layers, the way a flight planner reads an instrument panel: the macro line, the per-leg profile, and the per-meter surface.
Map layers in the order you should read them
- Elevation profile, to find the steepest sections and the safest ridge.
- Surface type, to find paved roads, shallow water, and safe rock.
- Coverage, to find grass, buildings, and terrain that blocks enemy sight lines.
- BT and MULE markers, to find the chokepoints that have to be avoided or prepared for.
Once those four layers are read, the route writes itself, and the rest of the delivery is just the small work of staying on the line.
Putting it all together: a single delivery as a worked example
Pick a mid-game order that crosses a river, climbs a ridge, and ends at a prepper in a remote shelter. The route planning, the cargo stack, the tool choice, and the recovery point all happen in the same order every time. The example below applies the walkthrough to that order without naming the specific prepper, so it stays useful for any mid-game delivery that has the same shape.
Step-by-step
- Drop a flag on the destination. Read the elevation profile. Mark the steepest descent on the second half of the run.
- Find a road that runs to within a short walk of the river. Plan to leave the road on the high side of the river.
- Build the cargo stack: heavy on the bottom, fragile on the shoulders, anti-BT tools on the back rack, weapons in the hands.
- Walk the first leg. Cross the river at the shallow point, not the fastest point. Use the boots, not the vehicle.
- Rest at the midpoint. Rebalance the load. Plan the descent. Check the timefall forecast.
- Descend on a diagonal, with the all-terrain anchor set on the steepest section. Use a covering grenade if the descent passes a known BT field.
- Walk the final stretch with the cargo light enough to recover from a stumble. Hand the cargo to the prepper, and only then turn around to look at the route you just walked.
The list is long on purpose. A delivery that is broken into seven steps looks like a lot of work. A delivery that is broken into one continuous push is the most common cause of a failed mid-game run.
Frequently asked questions
How long should a first episode take in Death Stranding?
A first episode typically runs between two and four hours, but the real number depends on how many side orders the porter takes. The walkthrough recommendation is to finish the main orders, then pick the side orders that connect to the same preppers, because each connection unlocks the next piece of gear. Taking every side order in the first episode is the most common cause of a slow first playthrough.
Is it safe to use vehicles early in the game?
Vehicles are safe on paved roads, on shallow water, and on any terrain that has been cleared of BT zones. Vehicles are not safe on the first ride through a forest, on a slope the porter has not walked, or in a BT field the porter has not crossed on foot. Use the boots for the first run through any new terrain, then bring the vehicle in for the second pass.
What is the right way to handle BT encounters?
Walk, hold breath through the cloud, and pick a short exit. Anti-BT weapons are useful on small clouds, and covering grenades are useful on long crossings. Do not start a long fight in a BT field. The cost in ammo and in time is rarely worth the cargo saved, and the simulation will keep generating BTs as long as the fight drags on.
How important is the online strand for a first run?
It is important enough to acknowledge, and unimportant enough to ignore for the first episode. The structures other players leave do help, but the structures a porter builds in episode two and three are what carry the mid-game. By the late game, the social layer has paid for itself many times over.
Should a porter replay episodes to farm likes?
Only after the main story moves on. Replaying an early episode to farm likes delays the network upgrades that make the harder deliveries possible. The walkthrough recommendation is to push the story forward until the network starts to pay off, then revisit the early routes with the gear that the network unlocks.
What is the best way to recover after a wipe?
Walk back to the prepper shelter or the safehouse, pick up the cargo from the locker, and retrace the route. The map has not changed. The simulation has not changed. The only thing that has changed is the porter. The walkthrough is built around that idea, which is why the recovery moments in the list above are placed where the porter would want them, not where the menu suggests them.
Do lethal weapons break cargo?
Yes. Lethal rounds pass through containers and can shatter fragile items. Use tranquilizer rounds, bola weapons, and non-lethal grenades when the cargo is more valuable than the time saved. The walkthrough does not ban lethal weapons, but it does recommend keeping them in the slot reserved for emergencies, not for everyday fights.
How does the load class change with vehicles?
Vehicles raise the weight the porter can move without slowing down, but they also lower the porter’s ability to recover from a stumble. A heavy load on foot tips over slowly enough to recover. A heavy load on a truck tips fast, and a tipped truck often ends a delivery. Treat vehicles as load multipliers, not as load eliminators.
What is the role of the prepper network in the walkthrough?
The prepper network is the most reliable source of new gear, new structures, and new orders. Connecting a prepper is more useful than completing a side order that does not lead to a connection. The walkthrough recommends picking one farming, one medical, and one engineering prepper early, and connecting them before adding the rest of the network.
Is Death Stranding playable without engaging with the story?
Mechanically, yes. The simulation rewards traversal, and traversal does not require the story. Narratively, the systems have more weight once the story is understood. The walkthrough does not enforce one order or the other, and a porter who enjoys the simulation first will usually find a different reason to return to the story.
Where to go next on the map
By the time the walkthrough loops back to the first delivery, the porter usually has a stable route, a working vehicle, and a short list of preppers that keep the network alive. The next move is to take the route that previously failed, and walk it with the new gear. Most of the early failure modes stop being failure modes once the simulation has been read correctly. The remaining failure modes are the ones the next death stranding walkthrough will cover, when the network asks the porter to cross the next stretch of country, with a heavier load, and a longer route, and a smaller margin for error.



Leave a Reply