
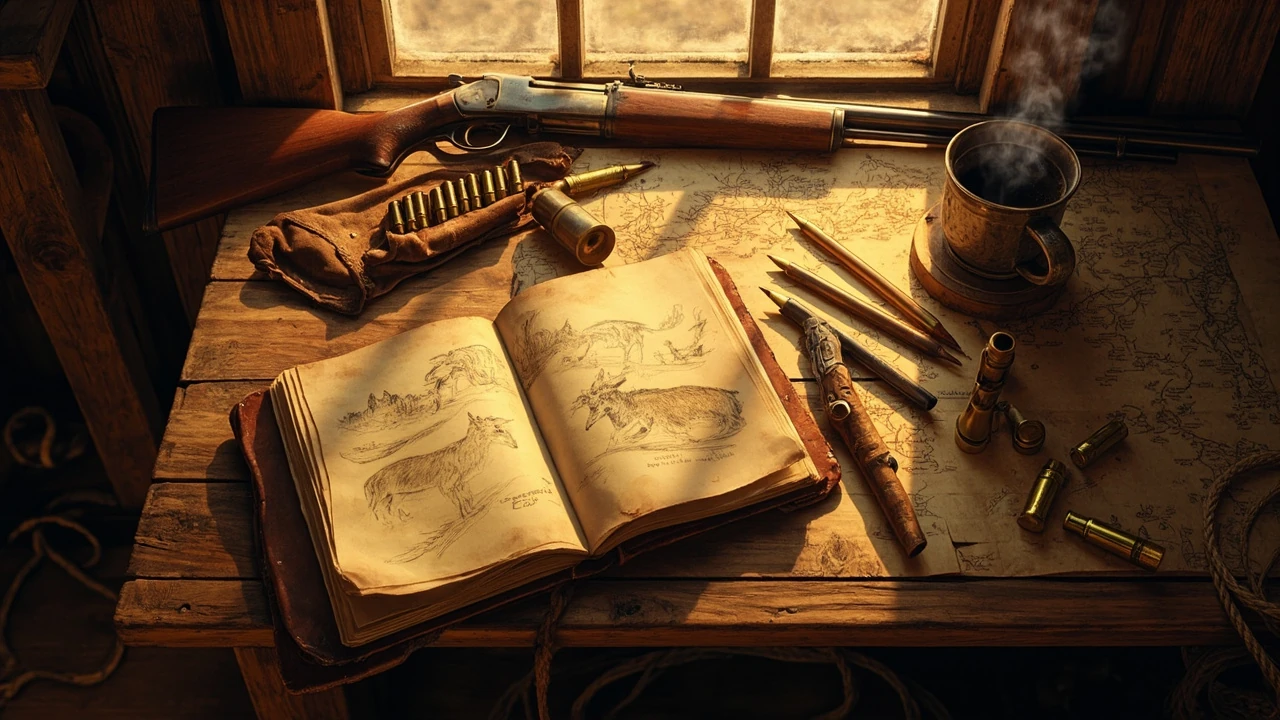
RDR2 legendary animals: a hunter’s field reference for Red Dead Redemption 2
Tracking rdr2 legendary animals in Red Dead Redemption 2 takes longer than most players expect, and the reason is rarely the hunting itself. A legendary hunt sits inside a layered system of chapter gating, Stranger mission prerequisites, weapon recommendations, and Trapper crafting payoffs, and it overlaps with two adjacent loops: the standard hunting economy that funds your camp and upgrades your satchel, and the Naturalist role from Red Dead Online, which uses a separate tracking model and a different species list. This reference is scoped to the single-player campaign. Where the two systems diverge, the article calls it out so a session is not spent chasing an animal that behaves the way it did in the other mode.
The single-player map carries sixteen confirmed legendary animals across New Hanover, Lemoyne, West Elizabeth, Ambarino, and New Austin. Each one is bound to a fixed coordinate, a fixed level, a fixed behavior, a fixed weapon prompt, and a fixed chapter requirement. The single-player set does not overlap with the Red Dead Online Naturalist set, so progress in one does not carry into the other. A few of them, including the White Bison and the Tatanka Bison, are the largest non-scripted creatures the engine renders on a routine encounter, and they punish anyone who rides in unprepared. The right approach depends on preparation, route planning, and an understanding of how the spawn rules actually evaluate.
How legendary animals actually spawn in Red Dead Redemption 2
Legendary animals in Red Dead Redemption 2 are not random encounters. Each one is bound to a specific map coordinate, a specific time of day, and a specific prerequisite. If the prerequisite is not satisfied, the golden paw icon on the map stays absent even when the player camps a few meters from the spawn point. This is the most common cause of the “I keep searching and nothing appears” report, and it has a clean mechanical explanation.
The game checks three layers before a legendary spawn activates:
- The relevant main story chapter or Stranger mission must be complete. Several hunts, including the Wolf and the Bull Gator, only open up after specific story beats in Chapter 6.
- The player must be within a defined proximity to the spawn region, typically a few hundred meters, or must be on a specific Stranger quest that points to the location.
- The player must not be currently inside a mission, a cinematic, a long-distance travel cutscene, or a hand-off animation. The game suppresses random and scripted encounters during these states.
When all three conditions are met, the paw icon appears on the map and a prompt shows the species and the required weapon class. You do not need to track the animal through the brush with a separate mechanic, despite what older fan guides claim. The icon is the gate. Once the player rides into the spawn region, the cutscene plays and the encounter begins. If the animal is wounded and flees, it respawns after a short cooldown, usually one to two in-game days. If the kill is clean, the carcass is delivered to the Trapper or the Fence for crafting, and the map marks the species as done with a permanent stamp.
The single-player spawn model is different from the Red Dead Online Naturalist model, where legendary animals roam free and must be tracked with binoculars and sedatives. The two systems use different animals in several cases, which is why a list compiled from one mode will be missing or wrong when applied to the other.
The full single-player legendary animal set at a glance
The table below lists every legendary animal in the single-player campaign, the territory it lives in, the chapter that unlocks the hunt, the weapon class the game recommends, and the primary crafting use for the materials. The “weapon” column matches the prompt that appears when the player first enters the spawn region, and it is also the safest practical choice. Other weapons can damage the animal, but the recommended weapon produces a clean kill in a small number of shots, which preserves the quality of the pelt.
| Animal | Region | Unlocks at | Recommended weapon | Crafted into |
|---|---|---|---|---|
| Legendary Bear | Grizzlies East, Ambarino | Chapter 4 (or earlier with the right Stranger chain) | Longarm rifle with high-velocity or express ammo | Hat, coat, and gauntlets set |
| Legendary Bighorn Ram | Big Valley, West Elizabeth | Chapter 6, after a “Quality” Stranger mission | Rifle with express ammo | Rifle and revolver variants |
| Legendary Boar | Bluewater Marsh, Lemoyne | Chapter 6, after the indicated Stranger mission | Repeating shotgun or rifle with express ammo | Trapper outfit and weapon variants |
| Legendary Buck | Big Valley and Little Creek River, West Elizabeth | Chapter 6, after the relevant Stranger mission | Longarm rifle with express ammo | Antler trinket, saddle, and talisman |
| Legendary Bull Gator | Bayou Nwa, Lemoyne | Chapter 6, after the gator-specific Stranger mission | Repeating shotgun or bolt-action rifle with express ammo | Trapper coat, gloves, and weapon set |
| Legendary Cougar | Gaptooth Ridge, New Austin | Chapter 6, after the indicated Stranger mission | Rifle with express ammo | Hat, vest, and talisman set |
| Legendary Coyote | Scarlett Meadows, Lemoyne | Chapter 6, after the indicated Stranger mission | Varmint rifle with small game or standard ammo | Hat, vest, and weapon variants |
| Legendary Elk | Forest, near Blackwater, West Elizabeth | Chapter 6, after the indicated Stranger mission | Rifle with express ammo | Garment and weapon set |
| Legendary Fox | Rhodes, Scarlett Meadows, Lemoyne | Chapter 6, after the indicated Stranger mission | Varmint rifle with small game ammo | Garment and weapon set |
| Legendary Moose | Roanoke Ridge, New Hanover | Chapter 4 (the cabin Stranger mission chain) | Rifle with express or high-velocity ammo | Hat, coat, and weapon set |
| Legendary Panther | Braithwaite Manor area, Lemoyne | Chapter 3 onwards, after the indicated Stranger mission | Rifle with express ammo | Hat, coat, and gauntlets set |
| Legendary Pronghorn | Rio Bravo, New Austin | Chapter 6, after the indicated Stranger mission | Rifle with express ammo | Trapper outfit and weapon set |
| Legendary Ram | Roanoke Ridge, New Hanover | Chapter 6, after the indicated Stranger mission | Rifle with express ammo | Garment and weapon set |
| Legendary Tatanka Bison | Great Plains, New Austin | Chapter 6, after the indicated Stranger mission | Rifle with express ammo | Hat, coat, and talisman set |
| Legendary White Bison | Lake Isabella, New Austin | Chapter 2 (via the indicated Stranger mission) | Rifle with express ammo | Hat, coat, and weapon set |
| Legendary Wolf | Cotorra Springs, Ambarino | Chapter 6, after the indicated Stranger mission | Rifle with express ammo | Garment and weapon set |
The chapter gating is the reason players miss a hunt. A handful of these animals, the Bear, the Moose, the Panther, and the White Bison, can be triggered from Chapter 2 or 3 through a Stranger mission. The remaining twelve species are gated to Chapter 6 and require a Stranger quest chain to be completed first. The Stranger quest markers are shown as small campfire icons on the map, and they are part of the standard “Legend of the East” or “Master Hunter” track rather than the main story.
Secondary reference table: spawn details and loot specifics
The first table answers “where and with what.” This one goes a step further and lists the exact landmark each legendary animal is tied to, the in-game time of day when the encounter is most reliable, the secondary crafting output the pelt or hide produces, and the practical difficulty rating based on how often a player loses the carcass or the pelt on the first attempt. The two tables together should be enough to plan a session without bouncing between three wikis.
| Animal | Landmark | Best time of day | Secondary output | Field difficulty |
|---|---|---|---|---|
| Legendary Bear | Orellina Spring, north of Widow Rock | Dawn to late morning | Bear Heart for Chapter 6 mission | High |
| Legendary Bighorn Ram | Northwestern slope of Big Valley | Midday | Rifle and revolver components | Medium |
| Legendary Boar | South of Bluewater Marsh, near the railroad | Early morning | Trapper garment components | Low |
| Legendary Buck | Little Creek River, west of Blackwater | Sunset | Buck Antler Trinket for skinning | Low |
| Legendary Bull Gator | Bayou Nwa, west of Lakay | Any time, but storms trigger aggression | Trapper coat and holster set | Very high |
| Legendary Cougar | Gaptooth Ridge, south of Tumbleweed | Night | Cougar Fang revolver and talisman | High |
| Legendary Coyote | Scarlett Meadows, west of Rhodes | Night | Coyote hat and vest | Medium |
| Legendary Elk | Forest west of Blackwater, near Upper Montana River | Dawn | Elk garment and weapon variants | Medium |
| Legendary Fox | Road north of Rhodes, near the train bridge | Dawn | Fox garment and weapon variants | Low |
| Legendary Moose | Northeast Roanoke Ridge, near the river fork | Midday | Moose antler trinket and talisman | Medium |
| Legendary Panther | Old Braithwaite Manor grounds, southeast of Rhodes | Night, after a storm | Panther revolver and talisman | Very high |
| Legendary Pronghorn | Rio Bravo, east of Armadillo | Sunset | Pronghorn garment and holster set | Low |
| Legendary Ram | Northern Roanoke Ridge, near the cliffs | Midday | Ram garment and weapon variants | Medium |
| Legendary Tatanka Bison | Great Plains, near the heart of New Austin | Any time | Bison duster coat and talisman | High |
| Legendary White Bison | Lake Isabella, northwest of Thieves’ Landing | Any time | Bison garment and weapon variants | High |
| Legendary Wolf | Cotorra Springs, far north Ambarino | Night | Wolf garment and weapon variants | High |
The “Field difficulty” column is editorial and based on common player reports. The Bull Gator and the Panther are the two species that consistently produce lost carcasses because they can charge before the player finishes the opening cinematic. The Buck, the Fox, and the Pronghorn are the cleanest of the set and are reasonable starting points for a player who is new to the legendary system.
Recommended loadout before you leave camp
A solid loadout shortens each encounter and reduces the risk of the animal fleeing into terrain the horse cannot follow. The exact kit can be adjusted by species, but the baseline below covers the vast majority of single-player legendary hunts.
- A repeater or a bolt-action rifle with a scope. The bolt-action Carcano is a popular pick because its accuracy keeps the pelt intact, but the Lancaster Repeater with high-velocity ammo is a reliable workhorse for moving targets.
- Express or high-velocity rifle rounds. Regular ammo will damage a legendary animal and the pelt, but it is far less efficient and may not produce a clean kill in a single shot.
- A Varmint Rifle with small game ammunition. This is required for the smaller species on the list, including the Coyote and the Fox, and is the cleanest way to drop a small animal without ruining the pelt.
- One or two Dead Eye tonics, or a full Dead Eye bar. The bigger animals, especially the Bull Gator and the Legendary Bear, can close distance quickly and the player needs a generous Dead Eye reserve to land the follow-up shot.
- Potent Snake Oil or a similar health tonic, particularly for the Bull Gator, the Legendary Bear, and the Legendary Cougar, all of which can deal fatal damage in a single charge.
- A horse with high stamina and a calm temperament, ideally one that does not buck when a predator charges. The Panther, the Cougar, and the Bull Gator are particularly hard on low-level horses.
For a clean hunt, the sequence is: study the animal with binoculars, load the correct ammunition, then mark the target with a thrown bait or a tracking shot. If the animal flees at low health, it usually returns to the spawn area after a short cooldown, so a fast horse saves more time than an extra rifle. If you have a hunting wagon, the cleanest workflow is to load the carcass immediately, skin it at the Trapper, and discard the secondary meat and fat that are not needed for the legendary outfit. Pelts, antlers, and hides from legendary animals do not stack in the horse inventory, so the wagon or a manual satchel slot is the only safe carrier.
Region-by-region hunt order for an efficient run
Because most hunts unlock at Chapter 6, the practical question is how to combine the earliest unlocks with the geography of the map. The order below is built for the smallest possible riding distance and the lowest number of fast-travel returns to camp. It assumes a start in Horseshoe Overlook with access to the southern roads, the Blackwater stagecoach, and the New Austin train stations.
- Start with the Legendary Bear at Orellina Spring in the Grizzlies East. The bear is one of the most aggressive animals in the game and benefits from a Dead Eye headshot followed by a close-range rifle burst.
- Move to the Legendary Moose at the northeast of Roanoke Ridge. The moose is large, slow, and tends to stay near water, so a single well-placed express round usually ends the fight.
- Head south to the Legendary Cougar in Gaptooth Ridge. The cat is fast, the brush is dense, and the spawn can be missed if the player rides past too quickly. Walk the final hundred meters.
- Drop down to the Legendary White Bison near Lake Isabella. The bison is large and tolerates several hits, so a high-velocity rifle round is worth the time to set up.
- Cross the map east to the Legendary Buck along the Little Creek River. The Buck spawns along the riverbank, and the area is also home to normal elk that can be confused for the legendary on a casual approach.
- Continue east into Big Valley for the Legendary Bighorn Ram. The rocky terrain limits sight lines, so a rifle scope is helpful.
- Drop into New Hanover for the Legendary Ram in northern Roanoke Ridge. The two rams can be confused, but the legendary has a more upright posture and a slightly darker coat.
- Move into Lemoyne for the Legendary Boar in Bluewater Marsh, the Legendary Fox near Rhodes, and the Legendary Coyote in the Scarlett Meadows area. All three are smaller species and benefit from a Varmint Rifle with small game ammo.
- Continue to Bayou Nwa for the Legendary Bull Gator. The gator is the single hardest fight in the set and benefits from a shotgun at close range combined with a rifle for follow-up shots.
- Finish with the Legendary Elk near Blackwater and the Legendary Pronghorn in Rio Bravo. Both are range-friendly and work as a calm end to a long session.
For the purposes of this article, all of the species listed above are the single-player set in Red Dead Redemption 2. The same general Red Dead Redemption 2 page describes the world map and the broad mechanics of hunting, which gives useful background on the hunting economy and the chapter structure that gates each legendary. The Red Dead Online Naturalist role and its separate legendary set are covered in the companion game’s own documentation, and they are not the subject of this reference.
The list assumes fast travel to key camps, which is unlocked through the main story. If fast travel is not yet available, the order is still efficient, but expect to spend extra time on horseback between Lemoyne and the Grizzlies.
Legendary animals and the Trapper crafting system
Killing the legendary animal is the short part. The work that comes next is the reason a clean kill matters. The Trapper, located in Saint Denis, Riggs Station, and Strawberry, accepts the legendary pelts, antlers, and hides and exchanges them for full outfit sets, individual garments, and unique weapon variants. The single-player Trapper accepts a defined set of materials per item, and the player must turn in the materials rather than simply paying gold. A poorly stored carcass can be lost, which forces the player to repeat the hunt on a longer cooldown.
The craftable outputs from the single-player legendary set include:
- The Bear Hunter Hat, Coat, and Gauntlets, sourced from the Legendary Bear. The set is one of the most common outfit choices for cold-weather chapters and is used for visual effect rather than warmth mechanics.
- The Bison Duster Coat, Hat, and Gauntlets, sourced from the Legendary Tatanka Bison and the Legendary White Bison. The two bison outfits share a similar silhouette and the choice is mostly cosmetic.
- The Ram Shotgun Coat and variants, sourced from the Legendary Ram and the Legendary Bighorn Ram. These are linked to specific weapon holster styles.
- The Cougar and the Panther sets, which overlap because the cougar and the panther provide overlapping materials. The cougar contributes the cougar-specific trims, while the panther provides the dark base garment.
- The Fox, Coyote, and Boar sets, which are smaller, lighter, and useful for warm-weather or low-profile character builds.
- The Bull Gator set, which is the most expensive because the gator provides both a coat and a holster variant, and the Bull Gator hunt is the most expensive in terms of consumables.
- The Moose and Elk sets, which are similar in silhouette to the deer and antelope sets but use a darker fabric and are commonly used in cold-weather screenshots.
The Trapper also uses legendary materials to make unique weapon variants. The most notable of these are the Cougar Fang revolver, the Panther revolver, and the Rattlesnake and Wolf holster sets. The player does not need to track which material maps to which weapon, because the Trapper interface shows the exact recipe for each item and the player’s current inventory of legendary materials.
For the most efficient Trapper workflow, the order of operations is: complete the hunt, ride the carcass to the nearest Trapper, store the legendary pelt with the Trapper or the camp warden’s stash, and then immediately mark the corresponding outfit and weapon variants in the Trapper menu. Skipping the storage step leads to a lost pelt if the player fast travels while carrying it on the horse, and the single-player Trapper does not store legendary materials automatically.
How pelt quality, weapon choice, and Dead Eye reserves interact in practice
Pelt quality is the silent constraint behind the entire legendary loop. A legendary pelt is always rendered as “Perfect” in the Trapper menu regardless of how it was taken, but a “Perfect” pelt that was dropped with three rifle rounds and a finishing knife produces a different outcome from a pelt that was taken with a single express round at the head. The game does not expose a quality bar to the player, but the secondary output, particularly the antler and the heart, can disappear if the animal is wounded and runs. A clean first shot is therefore not a stylistic preference, it is a mechanical requirement for the full set of crafting outputs.
Weapon choice follows the same rule. A revolver can down a Coyote, but a Varmint Rifle with small game ammunition produces the cleanest pelt and the highest chance of the secondary item remaining intact. A shotgun at close range works for the Bull Gator because the encounter starts at arm’s length, but the follow-up rifle round is what secures the heart. Dead Eye reserves matter because the larger animals rarely stand still for more than a single frame at long range. A player who burns the entire Dead Eye bar on a misread charge will not have enough reserve for the second shot, and a wounded legendary is the single most common way a player loses a full session’s work to a respawn timer.
Common failure modes and how to avoid them
Even with the right loadout, the legendary hunts trip players in a small number of predictable ways. Each one is mechanical, not random, and each has a clean fix.
- The paw icon never appears. The most common cause is a missing Stranger quest. The map does not show the spawn region until the right quest marker is picked up. Open the journal, look for “Master Hunter” or “Ducheses and Other Animals” or the specific hunt name, and ride to the nearest quest icon.
- The animal runs away at first sight. Several species, including the Coyote and the Fox, detect the player at extreme distance. Equip the Varmint Rifle and approach on foot, or use binoculars to mark the animal from range before opening fire.
- The pelt is poor quality after a long fight. A pelt downgrades after multiple rifle hits or a melee kill. The fix is to use a single express round at the head or the heart and to avoid the bow for large animals. The bow works for small and medium animals but reduces the pelt quality for the largest species.
- The player is killed before the animal dies. Several large animals, particularly the Legendary Bear and the Bull Gator, deal a high amount of damage per hit. The fix is to keep distance, use Dead Eye, and aim for the head. A few high-velocity rifle rounds drop the Bull Gator even on the highest difficulty.
- The carcass disappears. If the player rides the horse into a body of water, fast travels out of the region, or engages a new mission, the legendary carcass can vanish. Use the hunting wagon for the larger species, and never fast travel from a fresh legendary carcass on the horse.
- The Trapper says a material is missing. Some Trapper recipes require a combination of two legendary materials, often one from a large species and one from a smaller species. The in-game recipe list resolves this, but the player needs to have hunted both species first.
These failure modes are not bugs, and they are consistent across all difficulties. The single-player spawn logic does not change with difficulty, and the legendary animals do not scale their health in Hardcore Mode. The single-player encounters are designed for a player who arrives with the correct weapon, the correct ammo, and enough Dead Eye reserve to land the follow-up shots.
How the Red Dead Online Naturalist role overlaps with the single-player set
Red Dead Online uses a different legendary tracking system through the Naturalist role, and a list compiled from the single-player game will not transfer cleanly. The Naturalist legendary animals are tracked with the binoculars and a sample kit, sedated, and then either studied or killed. Several of the Naturalist legendaries do not appear in the single-player game, and several single-player legendaries, including the Legendary Bear and the Legendary Moose, do not appear in the same form in Online. If the player is checking their progress across both modes, the two inventories must be kept separate.
The crafting flow is also different. Where the single-player Trapper converts legendary pelts into outfit components on a one-to-one basis, the Online Naturalist sells samples to Harrietum for currency, and the resulting materials feed into a separate role track. A single-player player who tries to port their crafting logic into Online will be looking for recipes that do not exist, and an Online player who tries to follow a single-player checklist will be missing several species entirely.
Build choices and the role of legendary outfits in the late game
Once the legendary set is complete, the practical value of the outfits is mixed. The single-player game does not award stat bonuses for wearing legendary garments, and the outfits are mostly visual. The exceptions are the talismans and trinkets, which the player can craft at the Fence using a small set of legendary materials. Talismans and trinkets are stat-bonus items that persist across clothing changes and have a real effect on the late-game economy and combat loop.
The most useful crafted items for a finished run are:
- The Buck Antler Trinket, which increases the quality of skinning. A clean pelt at higher quality earns more money at the Butcher, and the Buck Antler Trinket is one of the few ways to push pelt quality beyond the standard “Perfect” tier.
- The Legendary Bear Heart, which is a one-time consumable used in a main story mission. The player should save this item until the relevant Chapter 6 mission is reached.
- The Legendary Cougar and the Legendary Panther Talismans, which provide a small but reliable boost to stamina or health core regeneration, depending on the variant.
- The Bull Gator and the Bison Talismans, which boost Dead Eye regeneration. These are the most powerful talismans for a player who relies on Dead Eye for the late-game combat encounters.
The legendary trinket and talisman tier is the part of the legendary hunt that pays back the time spent on the full set. For a player who only wants the cosmetic outfits, it is reasonable to skip the later hunts in the set. For a player who wants the late-game stat bonuses, the full set is the only path.
Frequently asked questions
How many legendary animals are in the single-player Red Dead Redemption 2?
There are sixteen legendary animals in the single-player campaign, spread across the five states of the map. The set is fixed, and the species do not rotate. Each legendary has one specific spawn location and one specific crafting output.
What is the earliest legendary animal you can hunt?
The Legendary Bear at Orellina Spring is one of the earliest accessible, available from the start of Chapter 4 or earlier if the player picks up the relevant Stranger mission. The Legendary White Bison near Lake Isabella is one of the earliest if the player explores the New Austin region in Chapter 2 through the relevant Stranger chain.
Do I need to be in Chapter 6 to hunt every legendary animal?
Most of the legendary animals unlock in Chapter 6, and several of the Stranger mission chains do not appear earlier. The Bear, the Moose, the Panther, and the White Bison are the exceptions and are available before Chapter 6 with the right setup.
Why does the paw icon not appear on the map?
The icon only appears once the relevant Stranger mission is picked up, the player is within the proximity of the spawn area, and the player is not currently in a mission, a cinematic, or a fast-travel cutscene. Each of these three conditions is required, and missing any one of them keeps the icon hidden.
What is the best weapon for legendary animals in RDR2?
The recommended weapon is shown in the prompt when the player enters the spawn area. As a general rule, large animals are best handled with a rifle using express or high-velocity rounds, and small animals are best handled with a Varmint Rifle using small game rounds. The right ammunition matters more than the right rifle for most of the set.
Can legendary animals be killed with a bow?
Yes, but the bow reduces pelt quality for the larger species. For the Legendary Bear, the Legendary Moose, the Legendary Bison, and the Legendary Elk, the bow is not the cleanest option. For the Legendary Coyote, the Legendary Fox, and the Legendary Boar, the bow is a viable option if the player is confident of a single headshot.
What happens if the legendary animal runs away?
The animal respawns at its original location after a cooldown of one to two in-game days. The player can skip time at camp, sleep, and return to the same spawn area to retry. The encounter does not reset the Stranger quest progress.
Do legendary animals carry over to Red Dead Online?
No. The single-player legendary set is separate from the Red Dead Online Naturalist legendary set. The two systems use different animals, different tracking mechanics, and different crafting systems. A player who completes the single-player set will not see those animals marked as complete in Online, and vice versa.
Can legendary materials be lost?
Yes, if the player fast travels, rides into a body of water with a fresh carcass, or loses the legendary animal by abandoning the encounter, the materials can be lost. The cleanest workflow is to use the hunting wagon for the larger species and to turn the materials in to the Trapper immediately after a clean kill.
Do legendary outfits provide any stat bonuses?
The legendary outfits themselves are cosmetic in the single-player game. The stat bonuses come from the legendary talismans and trinkets crafted at the Fence, which require legendary materials and persist across clothing changes.



Leave a Reply